
How to extract image in Photoshop
Adobe Photoshop is the predominant photo editing and manipulation software on the market. Its uses range from the full-featured editing of large photos to creating intricate digital paintings and drawings that mimic those done by hand. In other words, Photoshop is software used for editing photographs, compositing digital art, animating, and graphic designs. You can use photoshop to extract image from background, and other photo editing works. And here is a tutorial to extract image from background in Photoshop.
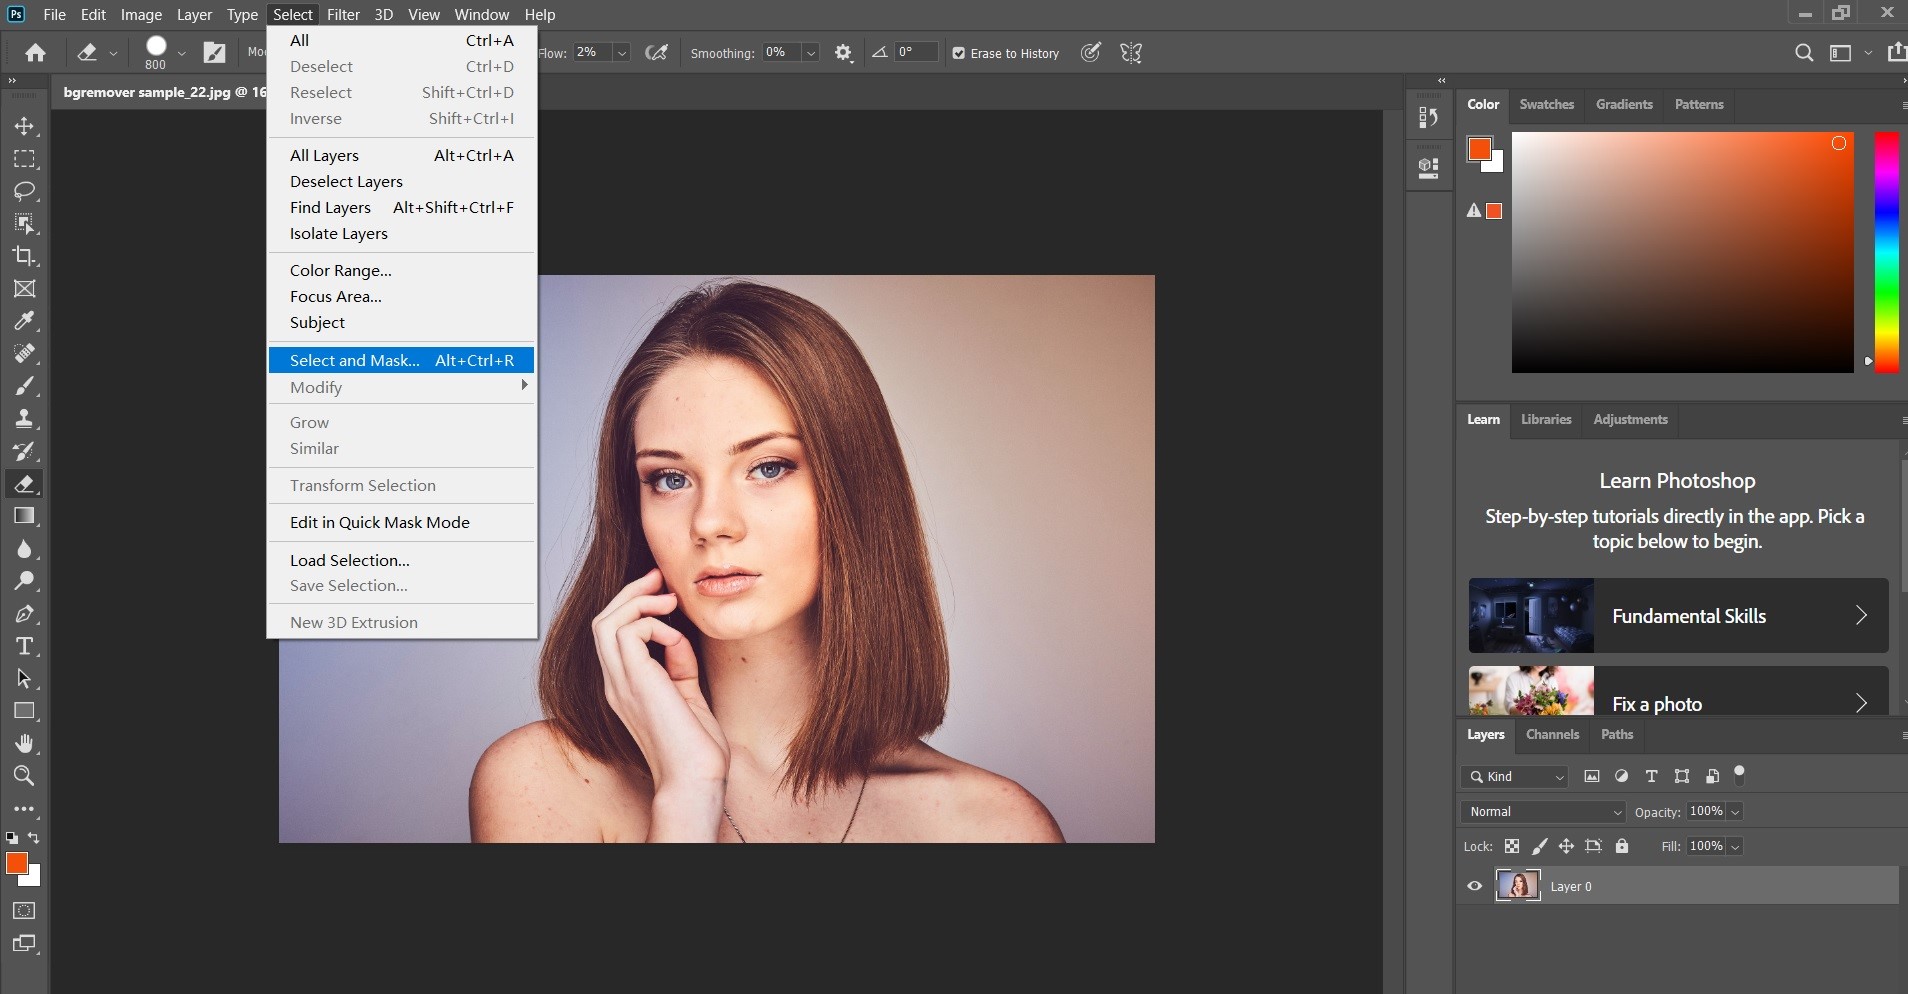
Step 1: Open a photo and select the object you want to extract from its background. Click the "Select" on the left top part, then choose the "Select and Mask".
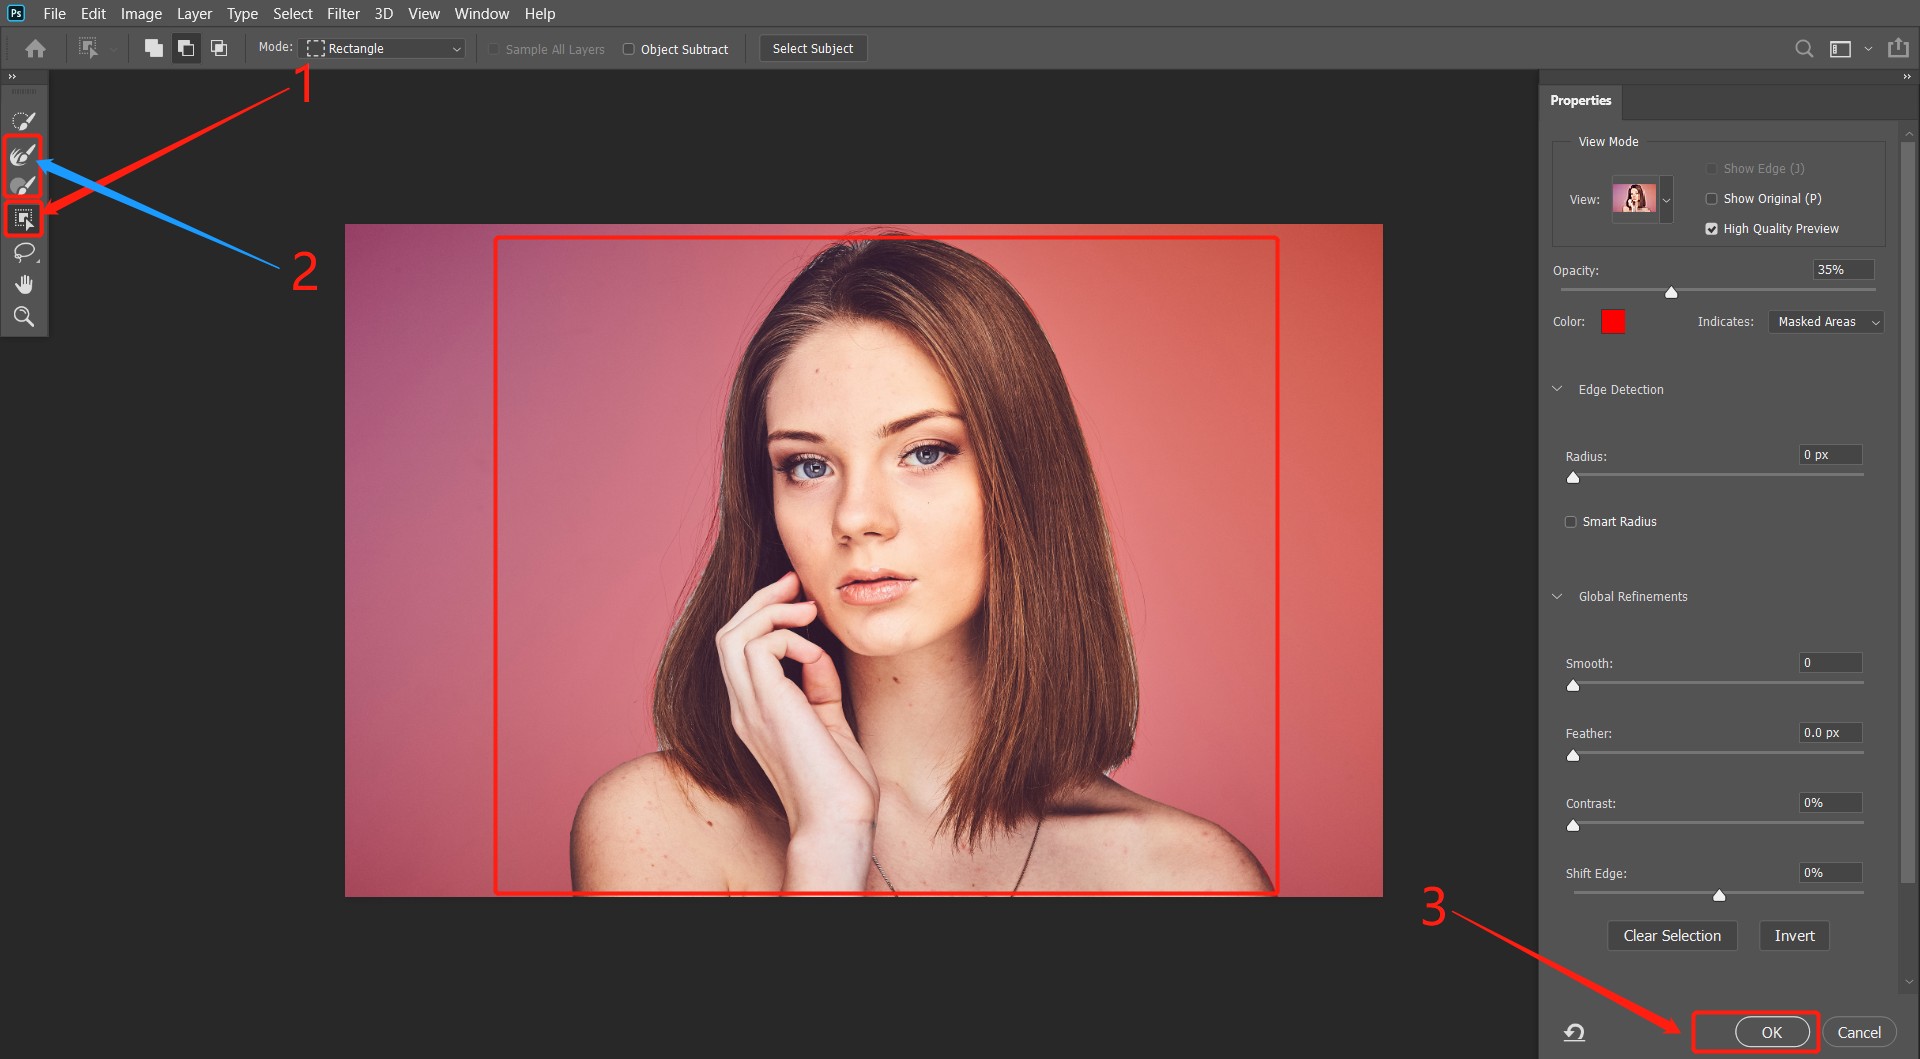
Step 2: Once you have finished the first step, then find the "Select Subject Tool" as I marked in red 1, and it will automatically select the subject as you want, and the blue arrow shows you to make minor adjustments for on the edge of the chosen subject. When you set all things done, click "OK" on the right button.
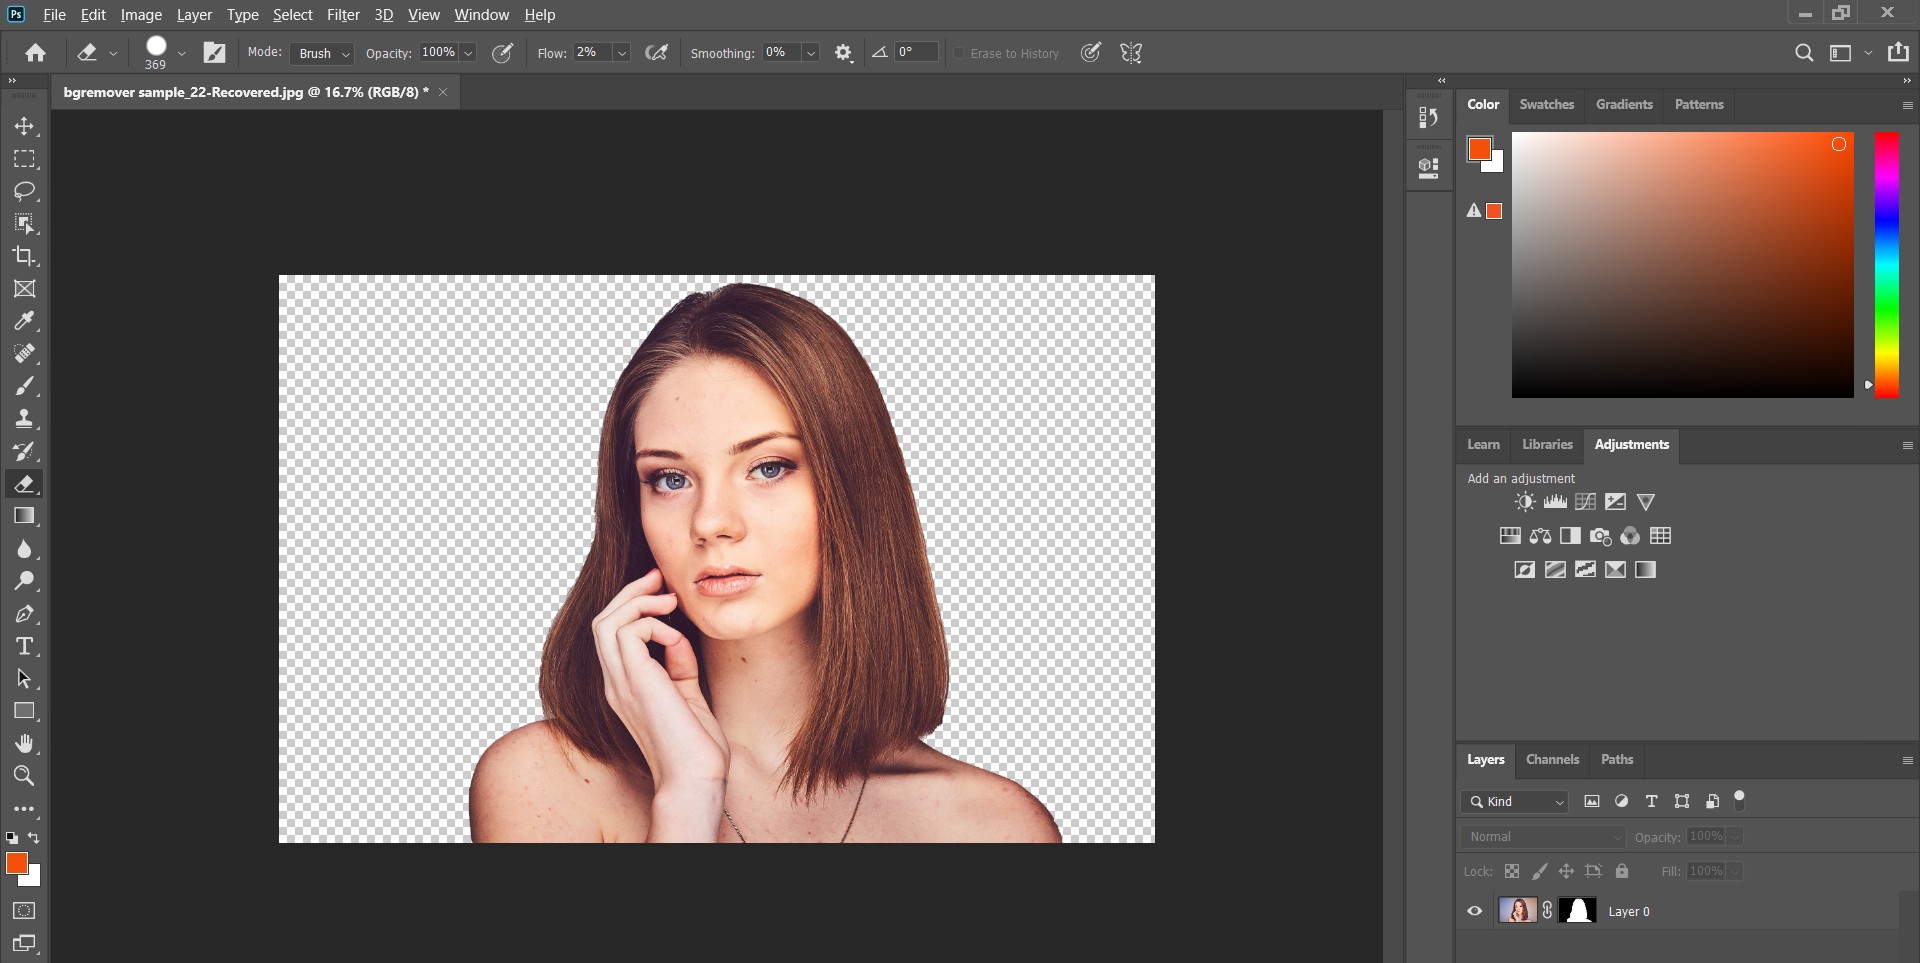
Step 3: Then, you successfully extract image from background in Photoshop now.
Step 4: When you have done the first three steps, create a simple extracted image. But later, you need to adjust the Edge parameters, Smooth, Feather, Contrast, try different sliders to see what works best for your image. If parts of the selection need more help, you can refine the edge by dragging the cursor off that part of the image.
Extract image from background using best Photoshop Alternative
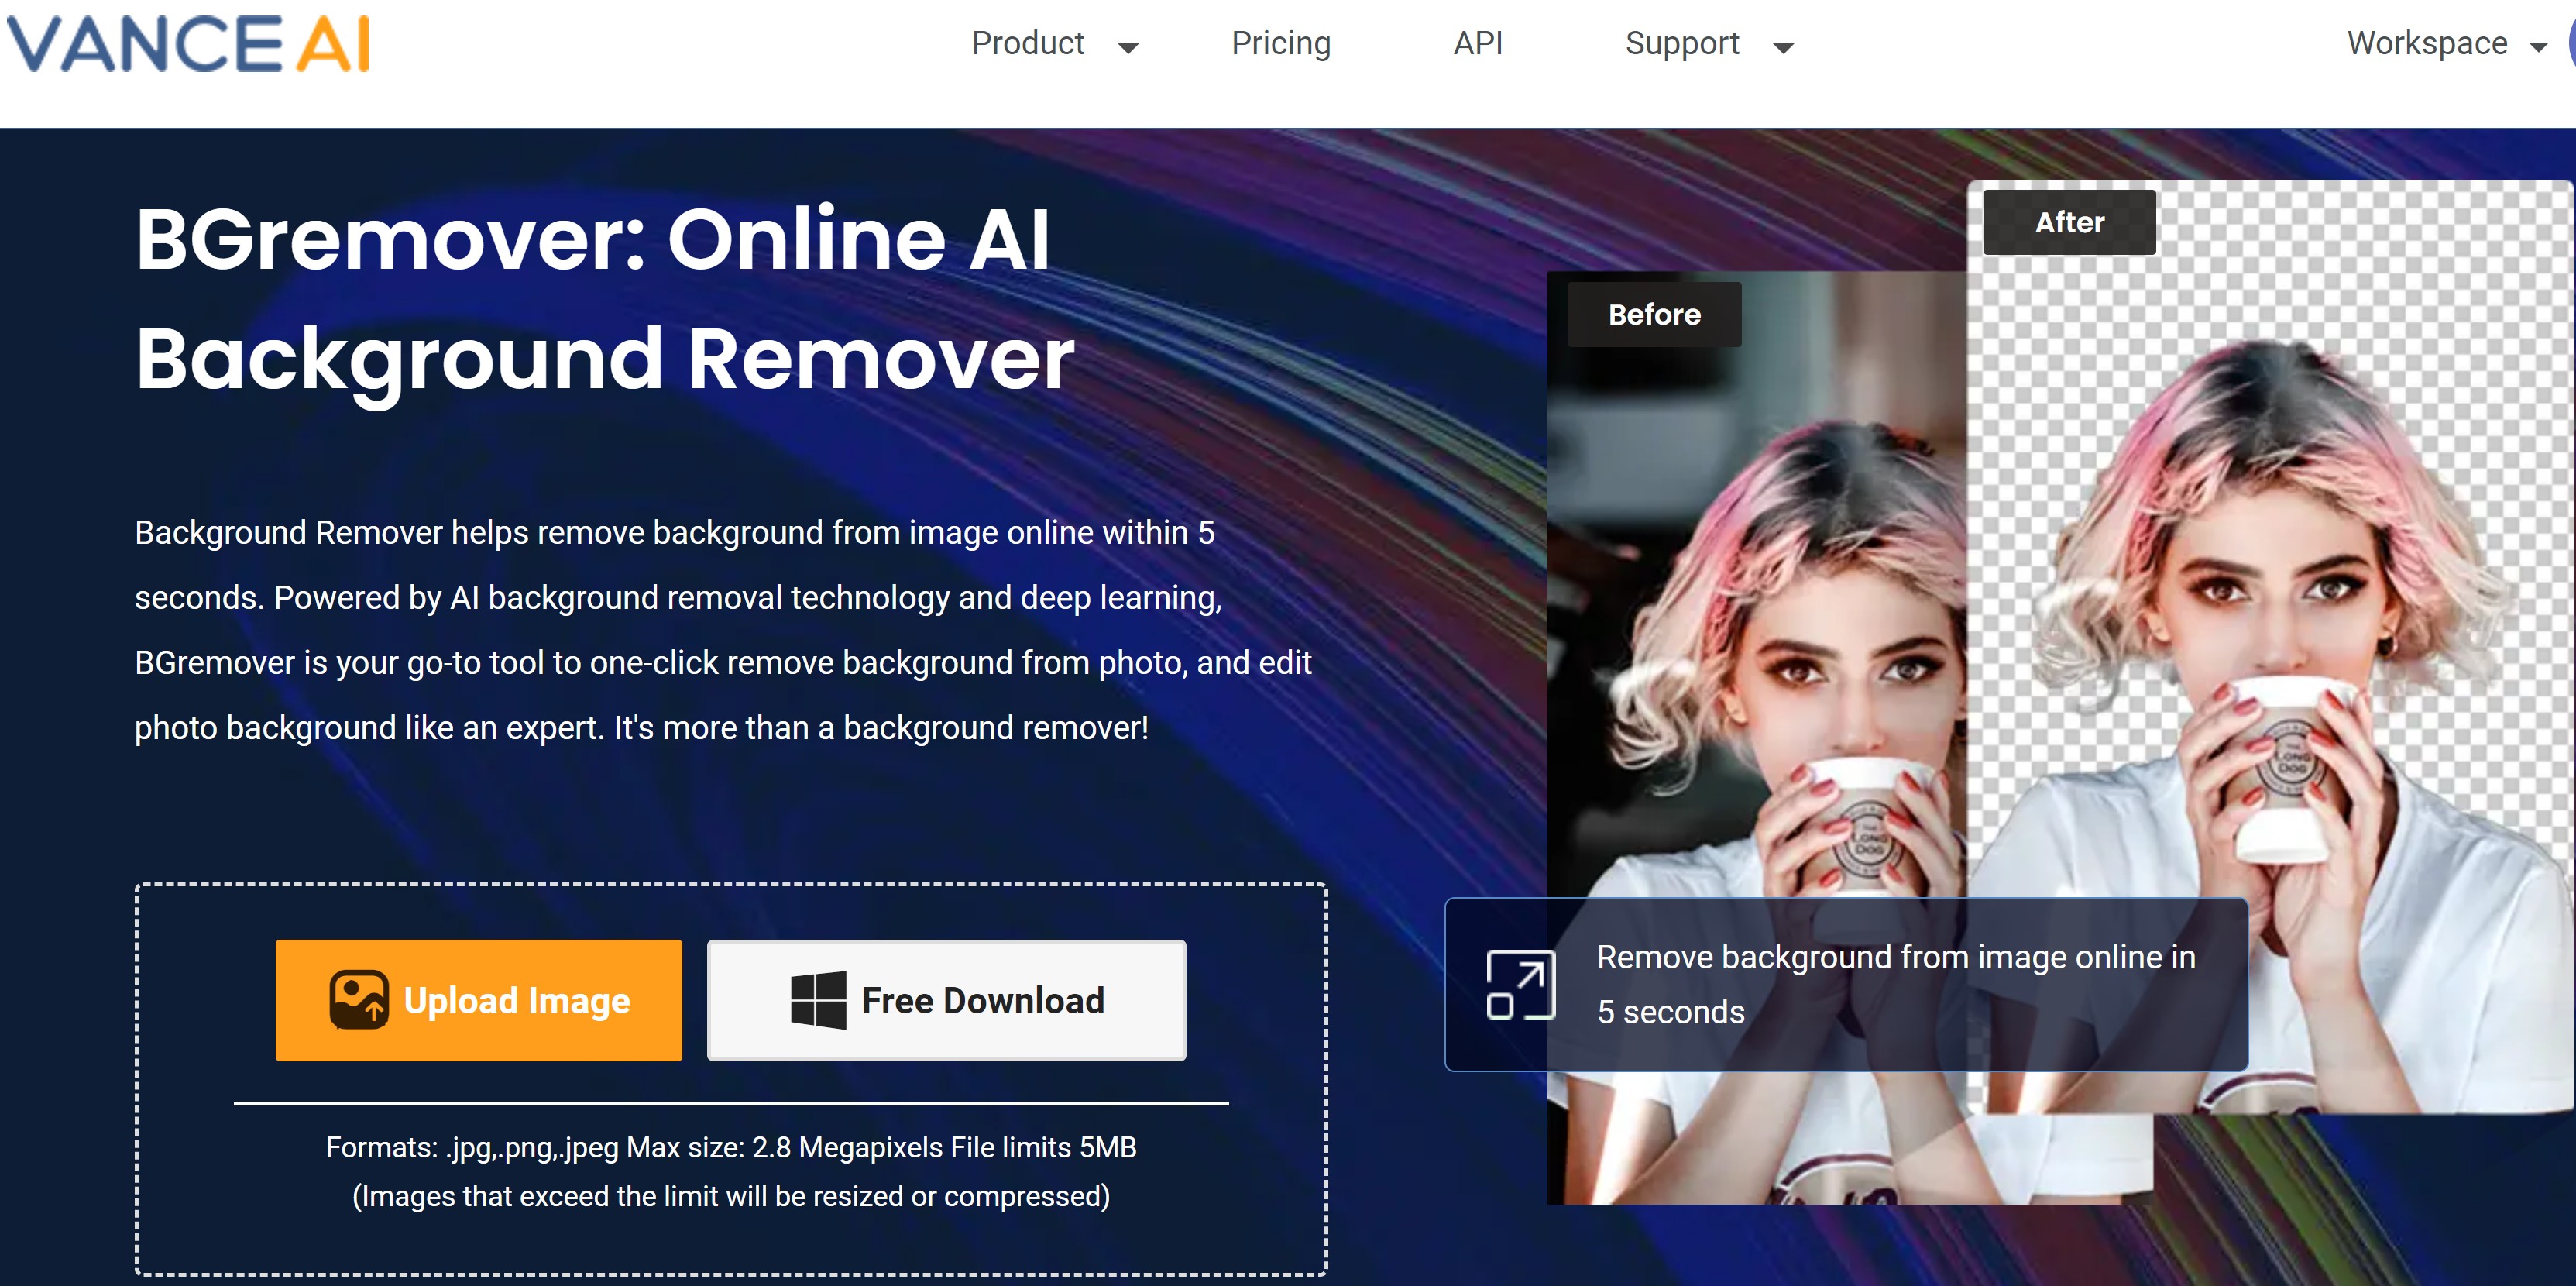
Photoshop is undoubtedly an excellent photo editor to extract object from background. However, here is another background removal tool that allows you to deal with background and image with ease, AI background remover. As everybody knows, there are complicated steps for photoshop, and it costs a lot of time, while BGremover helps you extract images from the background in seconds with only a few steps.
Steps to extract objects from a background with BGremover:
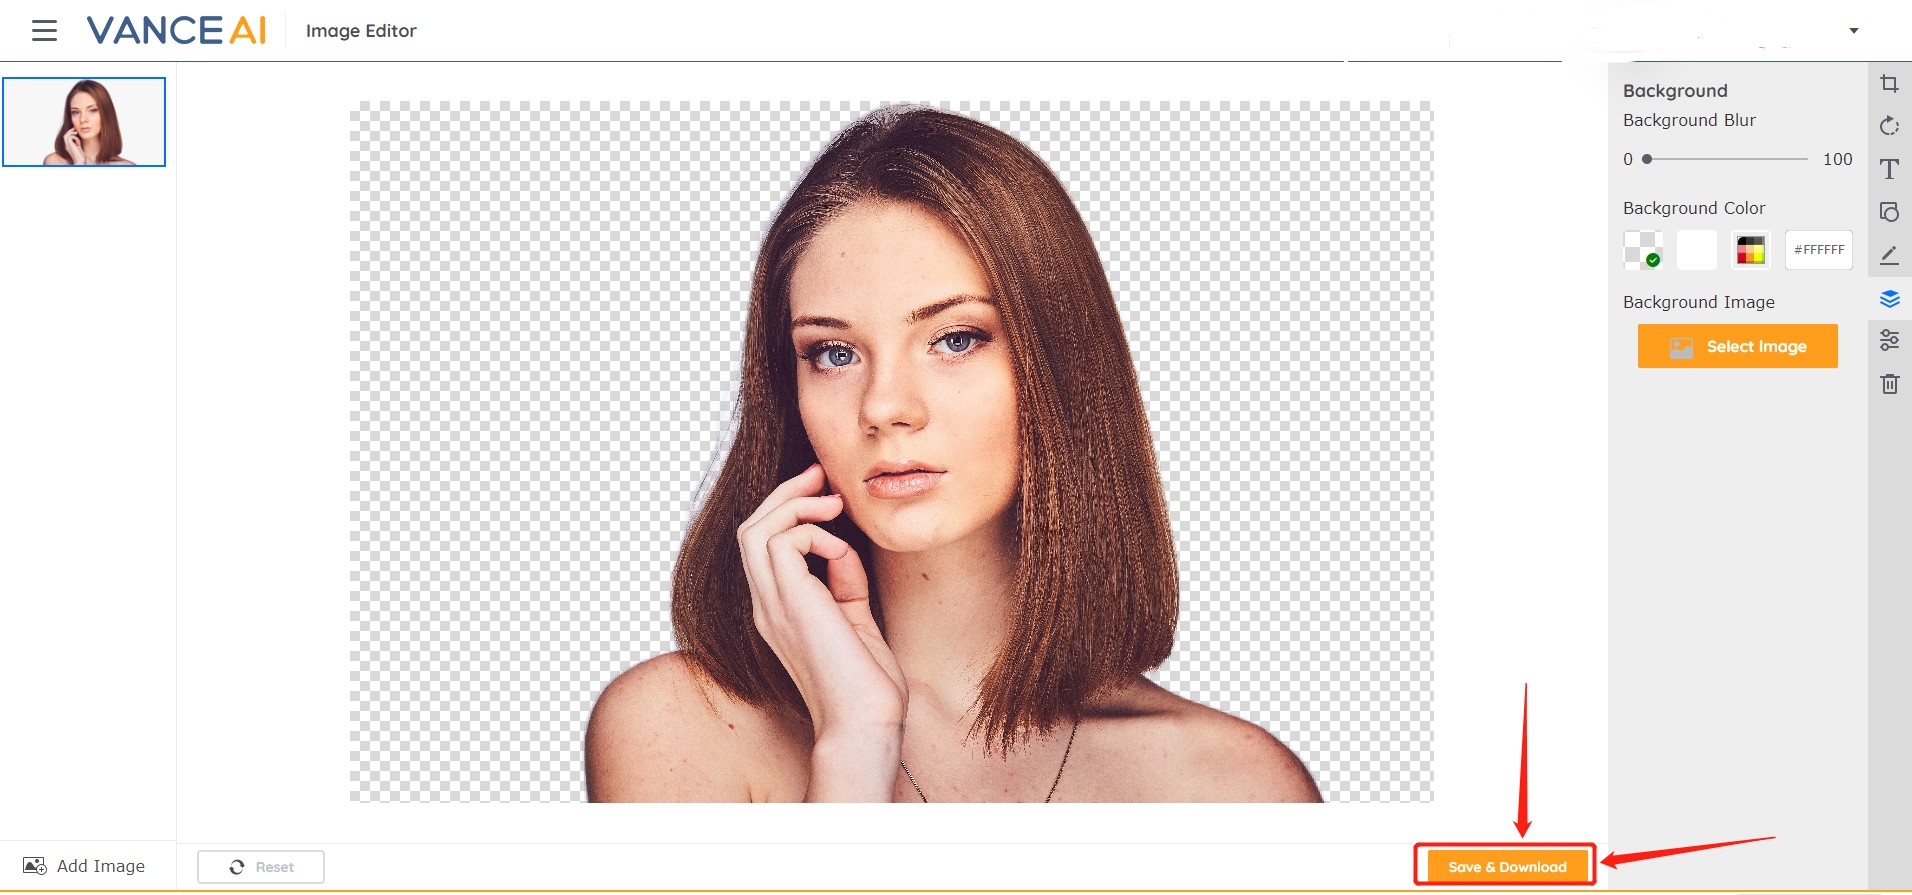
Step 1: Upload the image
Step 2: Click "Start to Process"

tep 3: Download the image.
BGremover Output Review
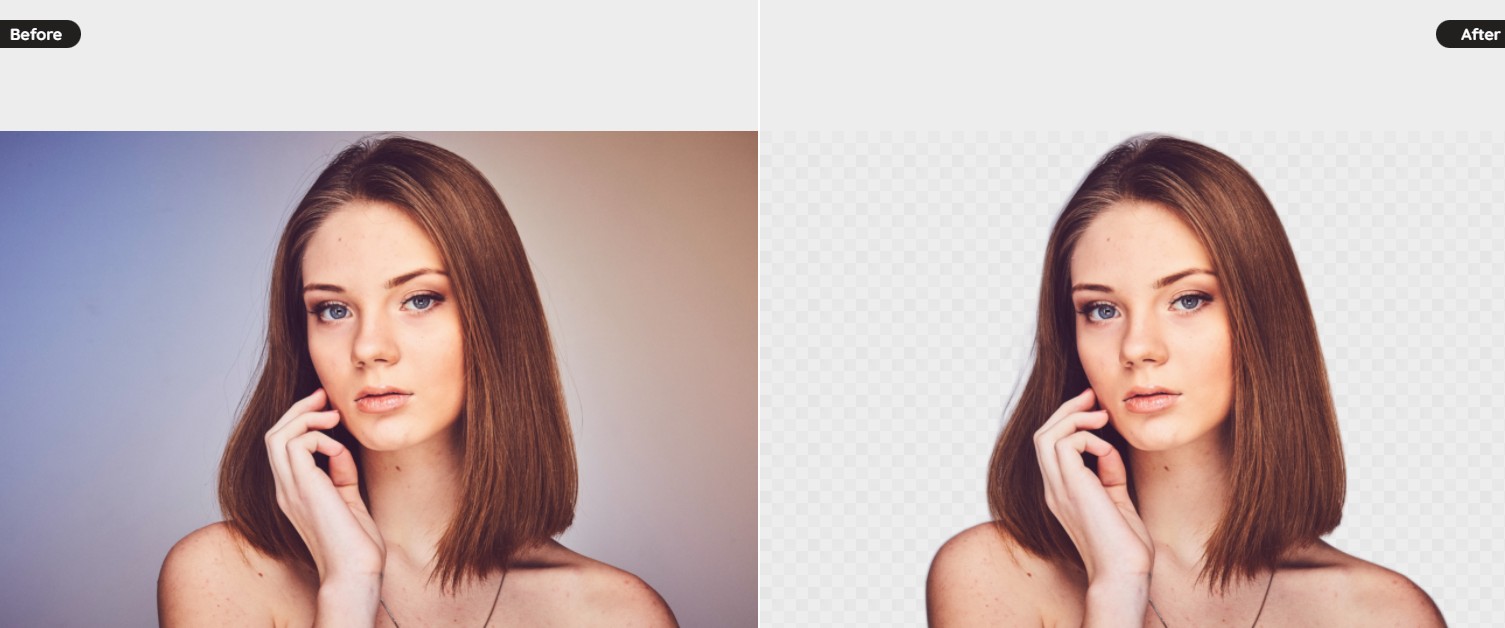
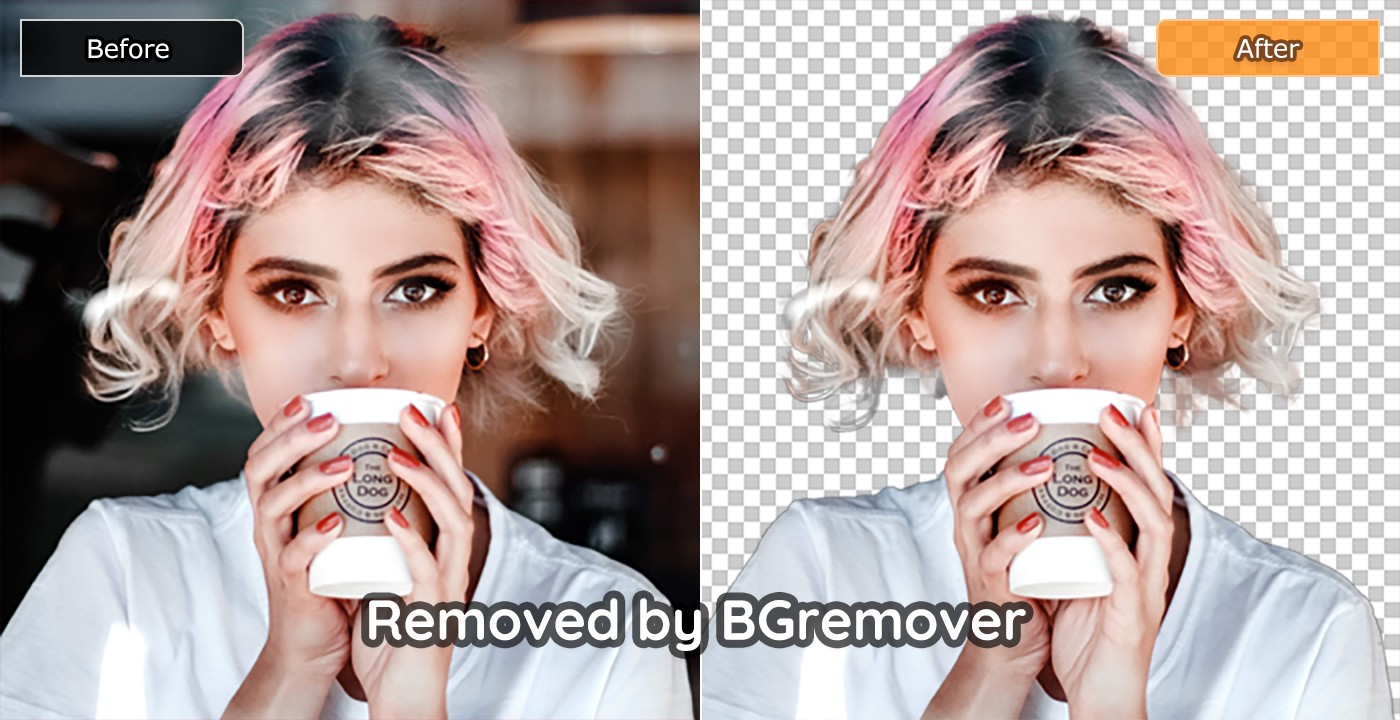
Once you upload the photo, BGremover helps you extract the image from the background instantly. From this image, we can see BGremover saved all the subjects well. No hair is lost or unclear pixel. Look at the eyes, the eyelashes. They all contain the way how they are. Let's compare this, to extracting images from the background in Photoshop and BGremover, obviously, BGremover processes the image faster and easier, and their output images seem no different.
About BGremover
BGremover is an AI-powered background remover that helps you remove background from image automatically and extract image from background. Its AI-tech and deep learning algorithm keeps hair details, fur pieces, cloth color, and other mini tiny parts ideally high quality. It is one of the best alternatives to extract image from background in Photoshop.
More tools may be of help: Top 10 Ultimate Background Eraser Tools Recommendation.
Conclusion
When people need to extract image from background, Photoshop is not the only choice. Like BGremover offered from VanceAI, there are a lot of Photoshop alternatives, and they are designed to improve people's work efficiency and reduce complicated workflows, as you can see how more accessible BGremover's instruction is compared with Photoshop. The processed image is quite good. No matter how you think of these two tools, try them both with the do-steps here. I believe you can have a more profound user experience than just reading the guidance. They both are excellent background remover tools. Choose the one that fits you!
You may also be interested in Top 5 Image Cutout Tools Review in 2022.